
 Well finally I feel like I can share something with you that I haven't exactly seen elsewhere within the crafty blogger world. So in my last post I mentioned that I was going to be painting a rug and I didn't know whether or not I should go with a chevron print or a medallion print. Well after much deliberation and hours of pining away I made the decision to steer clear from the chevron print because apparently everyone and their mother now owns a rug that they painted themselves that has a chevron print on it... seriously I am not kidding. In fact I want you to open up a new window in whatever web browser you are currently using and type in "diy chevron rug", but do your search under images not the web. Okay do you see what I mean?! There are 62,000 image results for DIY chevron rus and most of them are actually chevron rugs not weird random images of farmers, cartoons or the occasional explicit photo.
  Now, I know that the chevron print is super trendy right now, so that is a large reason why its everywhere, but seriously I couldn't stand to be that much of a follower (although the print will be making an appearance in my kitchen for another project) so I sought out a new design element. I found a beautiful rug the other day that had this gorgeous medallion print on it and after seeking some design council from my dearest bestie and sidekick we both felt this was the perfect choice.
  Since I had to make my own stencil (buying one for $50 was not an option - yes custom stencils like the one I am about to show you are not cheap) I had to go with a design that was relatively geometric and thus easily to duplicate on my computer and then print and cut out by hand. What you will see below is an image I made using Microsoft word in their publishing layout. I just overlapped different shapes until I had something that mimicked the original rug I saw and then printed it and cut it out. Then I went to my garage and found some old cardboard and got to work.
From here I basically traced the stencil out onto the cardboard mimicking the design I wanted on a larger scale.


After I traced the stencil I cut it out with a razor blade or box cutter. Even though you can see that I traced portions of only half of the medallions I only cut out the whole ones. I just needed to see the entire image traced out for spacing purposes.
Now here is where I wasn't pleased. I knew that doing the stencil this way was going to place the emphasis on the medallion center instead of the trellis pattern you get from the surrounding space in-between the medallions. I originally wanted to paint the trellis pattern instead of the medallion center, but that would have required me to cut out 50+ of the medallions then tape them to the rug and then paint the exposed space around them. That would have taken decades. So I just sucked it up and went with plan b although I really wanted plan a.

So I measured my rug and then placed the stencil in the center because I wanted to make sure I wasn't going to be left with awkwardly stenciled edges that weren't mirror images of each other. At this time in the project my plan was to stencil the entire rug, but I ended up changing my mind. You will see why in the end.

I set my tape measure across the opposite end of the rug to act as a guide as I moved the stencil forward. I wanted to make sure I was moving in a straight line. I could have placed tape here as well, but I was lazy.

Then I surrounded my stencil with cardboard to prevent any excess spray from hitting the rug because again I like quick projects and spray painting the rug would be significantly more time efficient then hand painting it with a brush.

This is what it looked like after one row of the stencil being painted onto the rug.

Someone woke up from her nap and had to chill with me in the laundry basket as I finished spraying the rug.

Okay remember earlier how I said that I originally wanted to paint the entire rug with the stencil. Here is where I changed my mind. Since the pattern I was painting was the medallion instead of the trellis I thought it was going to be too much paint over the entire rug. If it was just the trellis instead then you would see most of the rug with only the outline being painted, but that wasn't the case here. Instead I was painting most of the rug and only leaving a little bit of the actual rug exposed. So I again consulted by sidekick and she as well agreed with me to just do a strip of the stencil pattern down the center of the rug and then see how it looked in our master bedroom (since that was going to be its new home).

And boy was I glad that I did. I let the rug sit overnight on our back patio so that the paint had a full 12 hours to cure. I then brought it in and placed it in the little nook that is part of the weird floor plan that is our master bedroom. The rug fit perfectly and the medallion strip looked great with our new dressers. I was in LOVE.
Here are some more pictures with different angles and lighting to show you how it looks. Eventually there will be a chair in the corner and a tiny bookshelf with a small side table to act as a reading nook. I also have a really cool (renter friendly) wall treatment that I am going to do to the wall opposite the dresser. That will hopefully be completed by this weekend.

I centered the dresser on the pattern to draw your eyes to it more. Pardon the messy wires and laundry basket. Our bedroom is a work in progress.
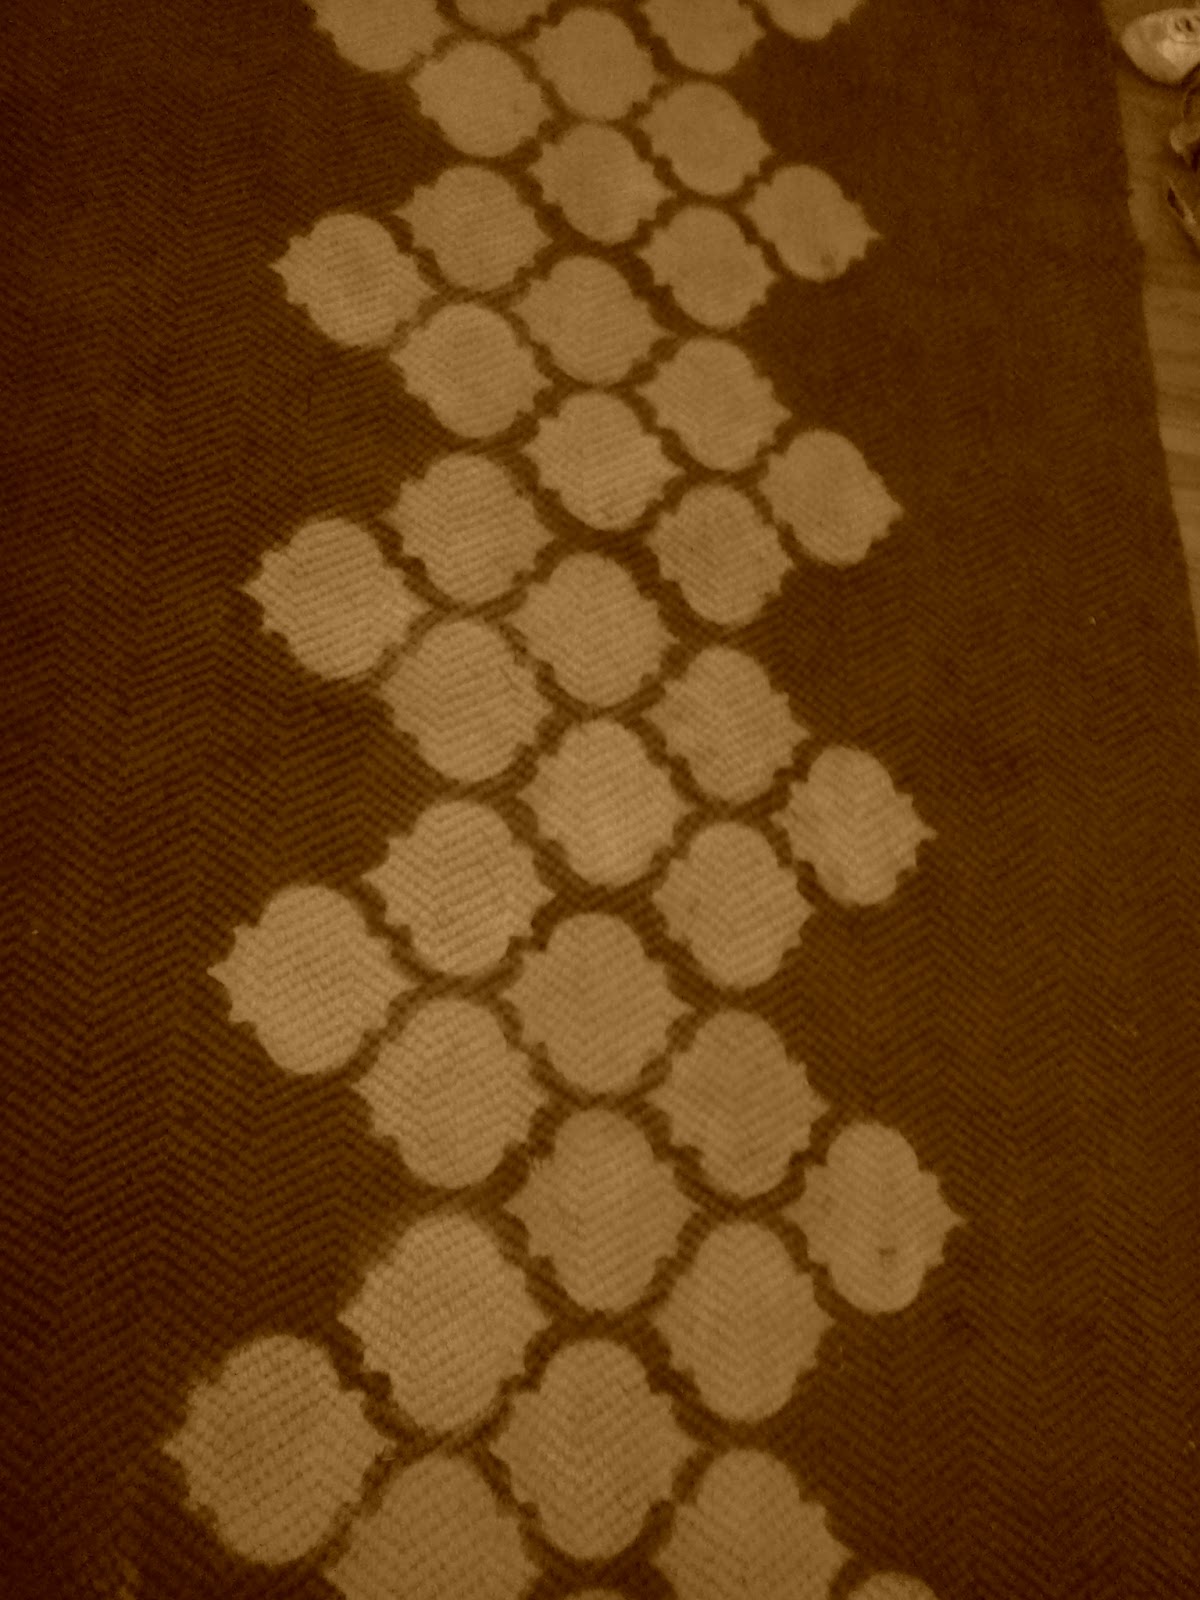
This is the pattern up-close. The rug is a brownish color and is made out of jute and I used a vintage white spray paint. (the color in the above photo is off since my picture app on my cell was on sepia opps)


Once again pardon the obvious mess. But this gives you an idea of where the little nook is within our bedroom... my dresser is to the left and our bed is to the right. More professional/completed photos to come once we are done.


Even though it came out completely different then my original plan I was extremely pleased!

I Pinned it. I Made it. And I Loved it!
A Few Things:
1. This project cost me $0.00 - I used a rug that we had lying around for the past 5 years and was 30 seconds away from being put on craigslist. I figured I should try and salvage what I could instead of spending $200 on a new rug. The paint I already had and the stencil I made from cardboard. You can definitely go buy a new rug and paint it, but its always nicer to do projects like this using the junk you already own.
2. Be careful when spraying your rug. Overspray is always an issuing when dealing with spray paint, but honestly sometimes its worth it because of how easy it makes everything. My lines weren't super sharp, but it worked out well for my specific project. If you wanted super sharp lines I would hand paint your rug. It does give it a more finished look.
3. My rug was 100% just so I used basic spray paint. Nothing fancy and it has since dried completely and is not rubbing off and isn't scratchy under my feet. Sometimes just using what you got works out just as good as buying all of the specialty products... but not all the time ; )
No comments:
Post a Comment